Table of Contents
WebCalendar User Manual
WebCalendar Version: 1.0.0
Introduction
WebCalendar is a calendar system. It is intended to be easy to setup and use while still providing advanced features and flexibility to serve the purposes of a widely varied user base. It can also be used as an events calendar for an organization or as a scheduling system for an intranet.
WebCalendar is an open source application. What does this mean for you? You get to use the application free of charge. (See the licensing section for more information on licensing.) Additionally, you have access to the WebCalendar developer community. You can post questions to various forums and have knowledgeable developers respond.
The primary site for WebCalendar development is at SourceForge.net:
http://sourceforge.net/projects/webcalendar/
The first public release of WebCalendar was in December of 1999.
Users and Events
WebCalendar can be configured to operate in either single-user or multi-user mode.
Note: If your WebCalendar is a single-user configuration, a large portion of this document will not apply.
All events in WebCalendar must be associated with one or more users. There is no limit to the number of users that can use WebCalendar (aside from system resources such as database space). Each participant will have a status for the event: “Waiting for Approval,” “Approved” or “Rejected.”
Note: If your WebCalendar is configured to not require approvals, then participants will always appear as “Approved” for all events.
If you add an event with yourself as a participant, your status will be “Approved” by default. If you include any other users, then their status will be “Waiting for Approval” until they either approve or reject the event. If configured to do so, WebCalendar will email participants notifying them that there is a new event waiting for approval on his/her calendar.
Note: As the creator of the event, you will not receive this email notification because your status for the event is automatically set to “Approved.”
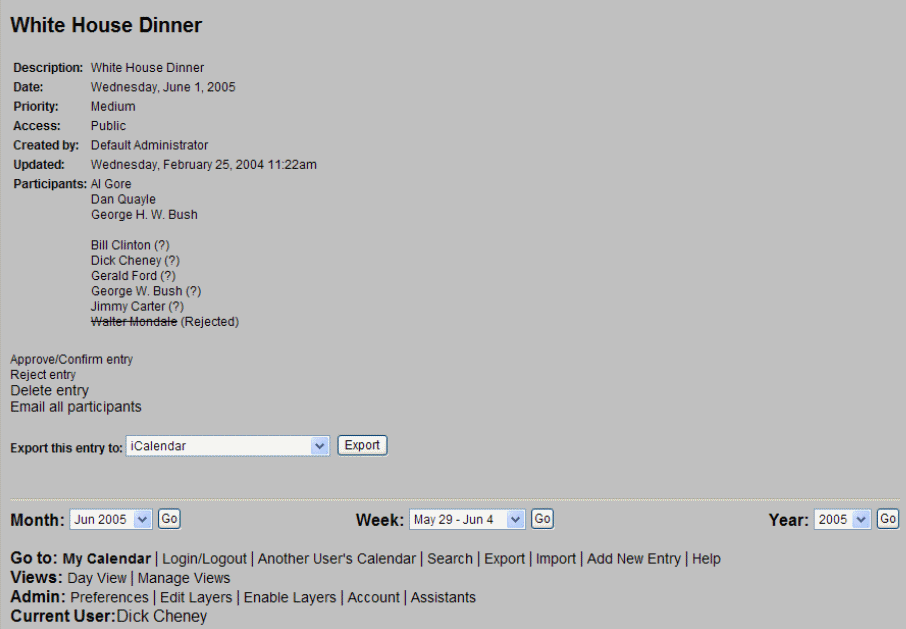
When viewing the details of an event, the status of event participants will be designated as shown below:
- If you did not create the event, then you can only delete the event from your own calendar. Other users will still have the event on their calendar.
- If you did not create the event, you will not be able to edit the event. Only the user who created the event can edit it.
- If you see an event on another user's calendar that is not on your calendar, the event details page will provide a link to add the event to your calendar.
- All changes to an event (accepting/rejecting, updating, deleting) are logged and are viewable by the system administrator.
Repeating Events
Repeating events may be used to create recurring event entries on your calendar. You may select an end date so that the event stops recurring on the specified date. The “Frequency” field allows you to specify how often the event occurs. Typing “0” or “1” in the “Frequency” field tells WebCalendar the event occurs every time (every day for daily, every month for monthly, etc.). Typing “2” in the “Frequency” field will indicate the event should occur every other time (i.e. every other day for daily, every other month for monthly, etc.).
Daily
If you select “Daily”, the event will repeat at the same time every day until the end date (if specified).
Weekly
If you select “Weekly”, the event will repeat every week on the day(s) selected until the end date (if specified). You must select days in the “Repeat Days” section when using repeat “Weekly”.
Monthly (by day)
If you select “Monthly (by day)”, the event will repeat on the same weekday of the month every month until the end date (if specified). For example, if the initial date is the second Monday of the month, the event will repeat on the second Monday of each month.
TIP: This feature can be used to handle complicated repeating events like Thanksgiving, which is the fourth Thursday in November. Just add an event called “Thanksgiving” and set the initial date to when Thanksgiving occurs this year. Then enter “12” for the “Frequency”. This tells WebCalendar to repeat the event every 12 months on the fourth Thursday of November.
Monthly (by day (from end))
If you select “Monthly (by day (from end))”, the event will repeat on the same weekday of the month (counting back from the end of the month). For example, if the initial date is the last Friday of the month, the event will occur on the last Friday of each month.
Monthly (by date)
If you select “Monthly (by date)”, the event will repeat on the same date of the month every month until the end date (if specified). For example, if you the initial date is May 12th, then the event will repeat on June 12th and so on.
Yearly
If you select “Yearly”, the event will repeat on the same date every year until the end date (if specified).
Public Access
If your system is not configured to allow Public Access, you may skip this section.
Public Access is useful if you want to publish part of the calendar to a larger userbase that isn't allowed to edit it.
If Public Access is enabled, an extra user will show up when creating a new event: the 'Public Access' user. To make an event visible to users that aren't logged in, simply select the 'Public Access' user as a participant for the event(s).
Note: Setting the 'Access' field to 'Confidential' will still publish the event if you select 'Public Access' as a participant for that event.
Remote Subscriptions
If your system is not configured to allow Remote Subscriptions, you may skip this section.
If your administrator has enabled Remote Subscriptions, you may enable it for your personal account by clicking 'Admin' ⇒ 'Preferences' ⇒ 'Subscribe/Publish' and selecting 'Yes' & save.
If a user has this option enabled, the URL for accessing the calendar via an external iCalendar-aware application (such as Mozilla Calendar or Apple's iCal) will be displayed.
If the 'Public Access' calendar is enabled, the Remote Subscriptions service can be enabled by following the same proceedure as above in the Public Access preferences panel.
External Users
If your system is not configued to allow External Users, you may skip this section.
External Users* allow you to add participants to an event that are not WebCalendar users. When adding or editing an event, you will see a free text area titled “External Participants.” In this area you can enter names of participants. If your system is configued to allow it, the External Participants will be notified via email when the event is created, and updated. In addition, external users will be reminded of an upcoming event via email, if the event has a reminder set.
External Participants should be specified one name per line (email address optional). All of the following would be legal entries:
Joe Smith
Smith, Joe
Joe Smith <jsmith@xxx.com>
<jsmith@xxx.com>
Email addresses within '<' and '>' characters will receive email notifications and reminders.
NonUser Calendars
NonUser Calendars* allow you to maintain a calendar that is not associated with a user. Users can then either view the NonUser Calendar (if the system settings allow it) or add the NonUser Calendar as a layer to their own calendar. For additional information on layers, see the layers documentation.
This can be used for resource management such as scheduling usage of a conference room. If used in combination with views, you can quickly & easily view the availability of multiple conference rooms on the same page.
Categories
If your system is not configured to use categories, you may skip this section.
Events may be associated with a category, but it is not required. Categories can be user-level or global. Each user maintains his/her own list of user-level categories, while the system administrator maintains the list of global categories.
When creating or editing event, you may specify the category for the event. If the category you select isn't a global category, and you select participants other than yourself for that event, other users will see “None” as the category. If you selected a global category, all users will be able to see the same category.
When viewing the calendar (month, week or day), a selection box is displayed near the top of the page that allows you to filter events based on a category. When you select a category from this menu, only events associated with that category will appear on your calendar.
Views
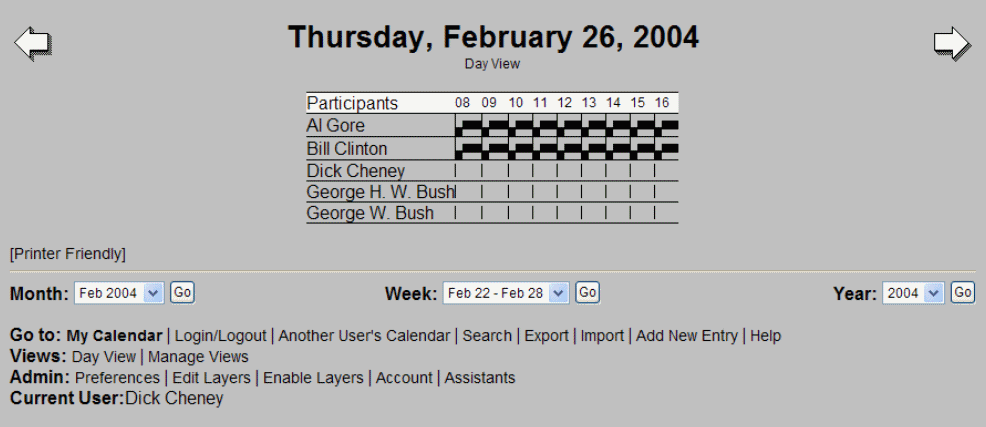
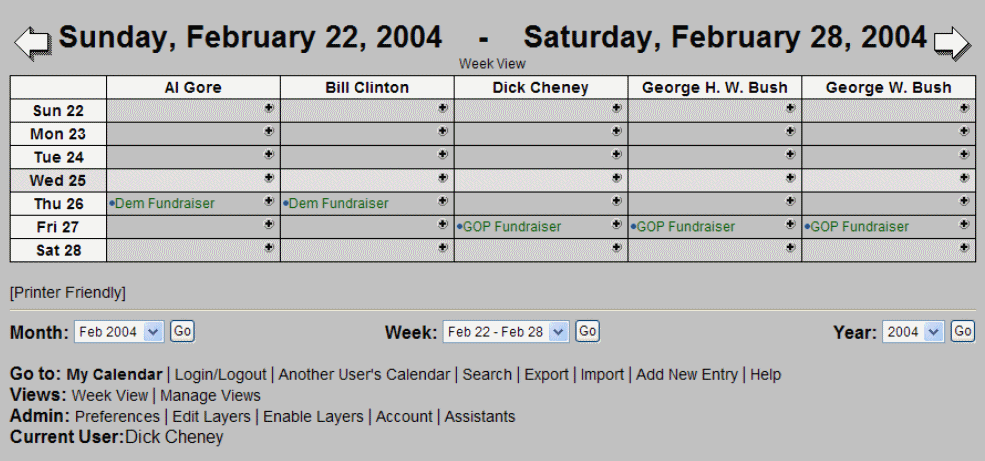
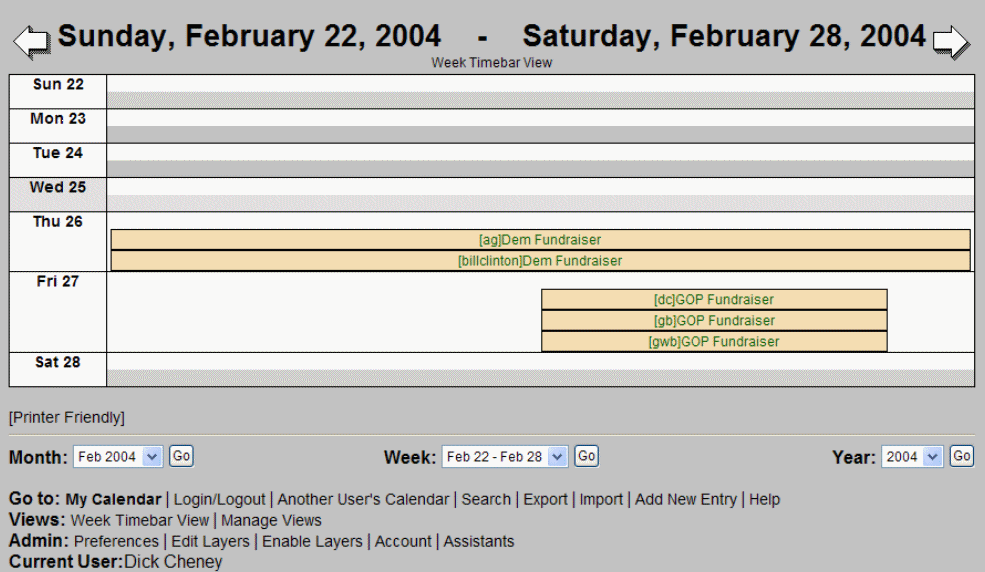
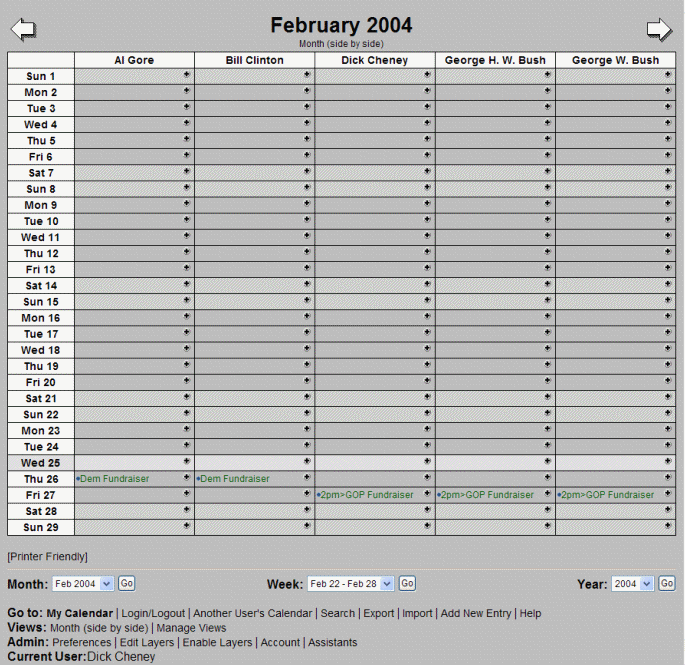
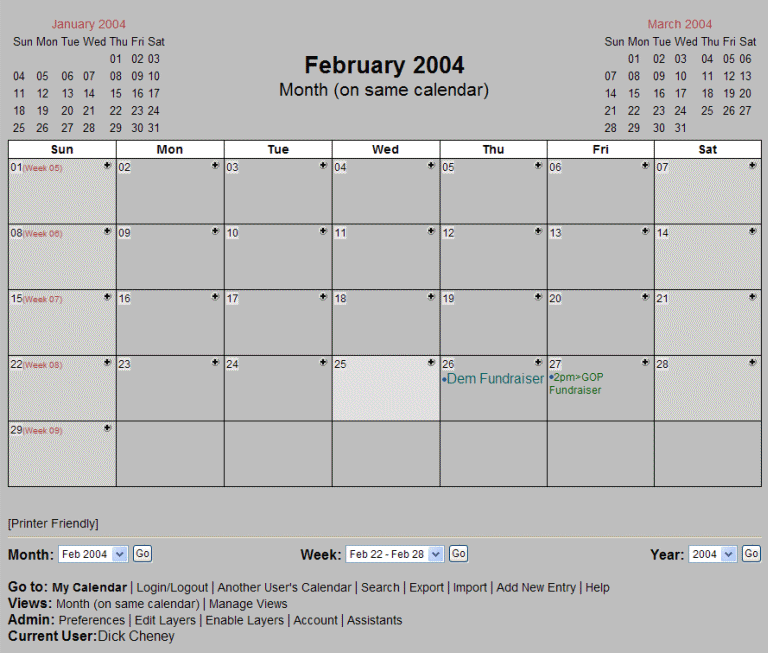
Views* allow you to look at the calendar of one or more users (or NonUser Calendars) at the same time. You can create a new view by clicking “Views” in the admin panel. Examples of the available view types appear below.
Day
Week (Users horizontal)
Week (Users vertical)
Week (Timebar)
Month (Side By Side)
Month (On Same Calendar)
Groups
If you system is not configured to use Groups*, you may skip this section.
Groups allow systems with many users to divide users into smaller groups of users. Additionally, if configured to do so, users can only access calendars of users in the same group(s) (both when viewing the list of available calendars or when selecting participants for an event.
When adding or editing events, a “Select…” button will be available. This button will popup a user selection window that will allow event participants to be selected by group.
Layers
Layers* allow you to overlay one or more calendars on top of your own. You can add a new layer to your calendar by clicking “Layers” in the admin panel.
When adding the layer, you can choose a color. When an event from that layer is displayed on your calendar, the text of the event will appear in the specified color.
TIP: On slow servers, you may find that layers cause the month view to be considerably slower. Set your default view to “Week” rather than “Month” in your Preferences.
TIP: If you have more than one configuration of users that you would like to use with layers, you can create more than one “Daily” View.
Assisant/Boss
If your system is not configured to allow Assistant Mode, then you may skip this section.
Assistant Mode allows one user (the Assistant*) to help manage the calendar of another user (the Boss*). The Boss creates the relationship in the calendar by clicking “Assistants” in the admin panel.
When the Boss has selected one or more assistants, each assistant will see a new “Manage Calendar of” link at the bottom of the page. This link will quickly bring the Assistant to a view of the Boss' calendar. When adding an event from this page, the default participant will be only the Boss.
Preferences
Various components of WebCalendar can be customized by modifying your user preferences.
Settings
Language
Specify the language you would like to use in WebCalendar
Timezone Offset
Specify how your local time differs from the time where the WebCalendar server is located
Preferred View
Select the view you wish to see after logging in. Available options include day view, week view, month view, or year view.
Display weekends in view
Specify whether you want Saturdays and Sundays to appear in month and week views, as well as in mini-calendars.
Date format
Specify how you would like dates to be displayed
Time format
Specify either 12-hour (3:45pm) or 24-hour (15:14) time format
Time interval
Specify how many minutes each time block represents in the day and week display
Auto-referesh calendars
If set to “yes,” the day, week, and month views will automatically reload after the duration specified in the Auto-refresh time textbox.
Auto-refresh time
Specify the number of minutes WebCalendar will wait before automatically refreshing pages.
Display unapproved
Specify whether events that have been added to your calendar but not yet approved should display on your calendar (in a different color)
Display week number
Specify whether the week number should be displayed in month and week views, as well as mini-calendars
Week starts on
Specify whether you want the week to start on Sunday or Monday
Work hours
Specify the default time range to display in day and week views
Default Category
Specify the default category that should be selected when adding a new event
Event reminders
Specify if you wish to receive an email reminder for events that specify a reminder should be sent
Events added to my calendar
Specify if you wish to receive email when another user adds an event to your calendar
Events updated on my calendar
Specify if you wish to receive an email when another user updates an event on your calendar
Events removed from my calendar
Specify if you wish to receive an email when another user removes an event from your calendar
Event rejected by participant
Specify if you with to be notified if a participant of an event on your calendar has rejected the event
When I am the boss
Email me event notifications
Specify if you wish to receive email when one of your assistants adds an event to your calendar
I want to approve events
Specify if you want to approve events added by any or your assistants
Colors
Document background
Specify the page background color
Document title
Specify the color of the page title
Table cell background
Specify the default background color for table cells
Table cell background for current day
Specify the background color for the table cell containing the current date
Table cell background for weekends
Specify the background color for table cells that represent a Saturday or Sunday
FAQ
Why do weeks start with Sunday instead of Monday?
The default setup of WebCalendar is to start weeks on Sunday. Your system administrator can change the system default setting. You can change the setting just for you in your Preferences.
Can I sync events with Palm/PocketPC/Outlook/iCal?
Export support is available for Palm and anything that supports iCal or vCal. Use the “Export” link at the bottom of each page.
I added a weekly repeating event. Why isn't it showing up?
Be sure to select the weekdays (Sunday, Monday, etc.) that you want the event to repeat on. If you don't select at least one, the event will not repeat.
Why can't I edit an event that another user added to my calendar?
If another user adds an event to your calendar, you cannot edit the event. This is a security restriction. You can reject the event rather than approve it, or you can delete the event from your calendar.
I'm trying to add a user as a participant to an event, but they do not show up in the list of users.
Your system administrator has enabled a feature that only allows you to view users that are in the same group(s) that you are in. Make sure the user is in one of the same groups that you are in.
TIP: WebCalendar setup and configuration issues are documented in the “WebCalendar System Administator's Guide”.
Licensing
WebCalendar is distributed under the open source GNU General Public License. If you have questions about this license, please read their GPL FAQ.
Getting Help
Try the Help/Troubleshooting forum for WebCalendar, hosted at SourceForge.net:
http://sourceforge.net/forum/?forum_id=11588
If you encounter a bug, please check the list of open and pending bugs. If you do not see anything similar, submit a new bug.
Glossary
Activity Log
A summary of recent updates to calendar data
Assistant
A calendar user that has been designated by another calendar user (the Boss) to help manage their calendar
Boss
A calendar user that has designated another calendar user (the Assistant) to help manage his calendar
External User
A calendar participant that does not have a calendar user account
Group
A mechanism of dividing up a large set of users into smaller sets of users
Layer
A function that allows a user to overlay another user's calendar on top of his own calendar so that the standard day, week and month pages show both his own and the layered user's events
NonUser Calendar
A participant to a calendar event that is not a user
Notification
An email message that is sent when an event is added, removed or updated in the user's calendar by another user
Preferred View
The standard page (day, week, month or year) that will be presented to the user after logging in (set in user Preferences)
Reminder
An email message that is sent before an event to remind the participant
Time Interval
The amount of time each “block” will represent in either the day or week view (set in user Preferences)
View
A customized page that presents the events of selected users
Work Hours
The default hours to show in the week and day view where events are displayed in blocks of time (set in user Preferences)
