Table of Contents
Nucleus: Blog Tutorial
Author: Pamela Cohen (PB on the Nucleus forums) of the Finster's Blog.
How-To Add a Blog Entry using the Nucleus CMS software
Getting Started
This How-To document will show you step by step how to create a blog entry using the web log publishing tool called Nucleus CMS. There are a lot of screen shots, and a lot of details to guide you through posting your entries. Note that the screen shots may not look like your environment; that's because different browsers interpret the code slightly differently, and I was using an older browser to get most of the screen captures.
First, this document will guide you through the basics of publishing a new entry. Later, you can get information on adding bold or italicized text to your text, adding a link to another web page, writing a draft (if you don't have time to finish your entry in one sitting), writing a really long entry, publishing an entry at a specific time in the future (or the past), and adding images. Note that the administration interface has options that I won't describe here, but you can experiment with those options once you've figured out the basics.
Assuming you installed the Nucleus CMS software at the root of your web site, the URL for your blog will be http://www.yourdomain.com/. This address is where people will read your articles.
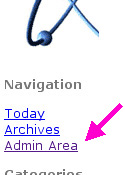
The URL for blog administration — and where you will write your articles — is http://www.yourdomain.com/nucleus/. You can get to this location right from your front page by clicking on the Admin Area link:
When you write your entries, I suggest you have two browser windows open: one with your blog, and the other with the administration pages. This way, you can reload and give your blog entry a final visual check when you publish it.
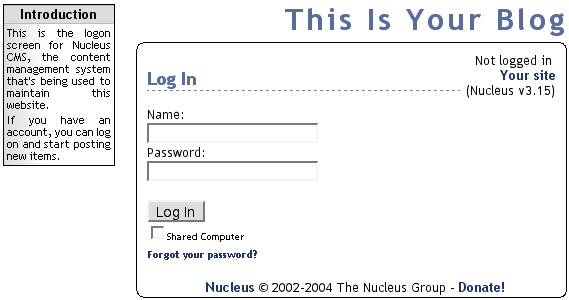
Here's what you'll see when you visit the administration pages, http://www.yourdomain.com/nucleus/ (the width will change with the size of your browser window). Keep in mind that this How-To uses “This Is Your Blog” as the site and the blog name, “yourBlog” as the short blog name, and “Jane Doe” as the author. Your experience will vary.
To log in, enter the name and password that you created when you installed the software, and then click on the “Log In” button. Here's the top of the page you'll see once you log in (again, the width will change with the size of your browser window — I've made this pretty narrow to show everything):
Three quick notes:
- You will be logged in as your name (not “Jane Doe”)
- The words “Your site” is a link, that will take you to your blog's front page.
- You can write your articles on any computer that has internet access. If you use a machine that isn't your own, you should Log Out when you're finished!
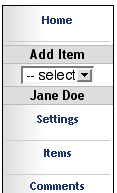
Another note: I'm not going to pay too much attention to this column on the left, since you won't need it much to write blog entries. It's important stuff, though, you'll want to explore it later.
Writing a Simple Blog Entry
To write a new article, click on the “Add Item” link under “Actions.” (This time, I didn't make the browser window so narrow.)
Below is the important part of what you'll see next:
Quick note: If you click on this question mark, you'll get a popup screen with information about adding items, and what sorts of things can go into the “Body.” These question marks are all over: use them and learn.
Click your computer mouse in the box labeled “Title” to enter the title of your entry, and then click in the “Body” box to write the entry itself. If you want a new paragraph in your article, just hit “return” again to leave a blank space in the “Body” box. Your entry can be as long as you want — a scroll bar will appear on the right side of the “Body” box if it's needed. NOTE that you can also create a very long article, where the beginning will appear on the main blog page, and the rest linked to another page. Instructions for that appear later in this document.
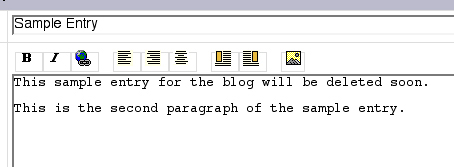
Here's my very short sample entry:
When you're finished writing your article, scroll down the administration page to the Category section.
For now, we'll just leave this on the “General” category. These categories will enable readers to view organize your blog entries by topics you choose. A bit further down in this section, I'll describe how to make a new category.
Next, scroll down to the Submit section.
In most circumstances, you will leave the button for “Add Now” selected, and simply click on the “Add Item” button. (You can find out about publishing at a different time, or creating a draft, later in this document.) Clicking that “Add Item” button publishes the article into the web log.
Here's what you'll see when you click the “Add Item” button:
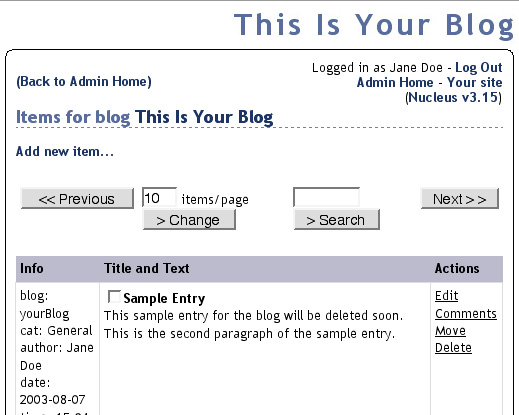
Your most recent entry appears at the top of the Items page; if you've written more articles they'll appear below it. This sample entry is very short; if your article is long only the first few lines will appear on this page.
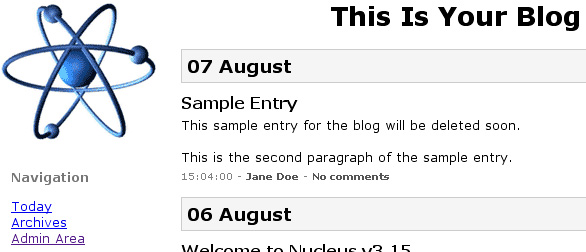
Now, go to another browser window with your blog in it, and reload or refresh the page to see your article. I suggest you review the article to make sure it's spelled correctly, and looks right. As you can see, all the formatting, date and author information is performed automatically by the web log publishing tool:
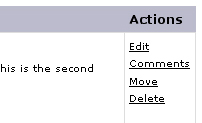
If you see any problems, go back to the browser window with the administration interface, and click on “Edit” under the “Actions” options on the right of the entry.
This new page will look like the “Add Item” interface. Make your changes, and scroll down. This time, instead of a “Submit” section where you add the item, you'll see an “Edit Item” section where you change the item:
If you wish, you can choose to delete the article, or update the timestamp to “now.” But for the most part, you'll simply click the “Edit Item” button to make your corrections. Reload your blog page in your other browser window for a final visual check.
Once you're satisfied with your article, it's finished!
Adding a New Category
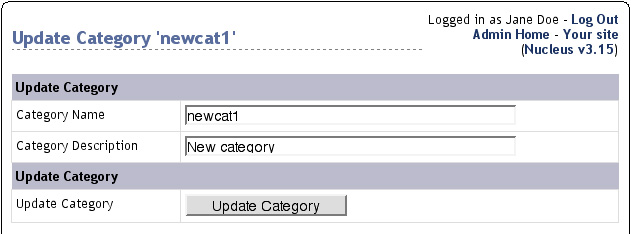
Next, let's show what happens when you make a new category. Instead of using “General” for the entry, choose “New Category…” — here's what happens. First, you'll click the “Add Item” button just like before, but then you'll see a screen asking you to update the “newcat1” category:
Obviously, you'll change the information to something like this:
When you click on the “Update Category” button, you'll see a page that starts out like this and has a whole bunch of stuff you don't want to mess with now:
…unless you want to add a few more new categories. In that case, scroll down to the bottom of the page, where you'll see a very familiar form to add new category names and descriptions. Otherwise, click on the “(Back to Admin Home)” link at the top of the page to get back to (obviously) Admin Home. From there you can add another blog entry. Or, if you're finished…
Backing Up the Database
…consider backing up your database. Just as you should back up your computer regularly, you should also back up your Nucleus database regularly. Even the best web host can have disasters. Here's how to do it. Remember that column on the left of all your administration pages?
Scroll down the page and click on the “Backups” link and follow the directions on that page. This will save a copy of the database onto your computer hard drive (so if you're not on your own computer, you won't want to do this). And, as the page says, this will backup the database, but not anything else. You'll have to make up your own rules to back up all of that.
Log out
Finally, log out of the administration interface if you're not on your own computer. You wouldn't want the next guy at the internet cafe to write something mean, would you? On the other hand, if you're using your own computer, you can stay logged in forever. (Just don't forget your user name and password, in case you want to blog from the road one day.) The only thing to think about next is writing your next blog entry.
Quick Review
Quick review of the basics:
- Log in
- Enter title
- Enter body
- Choose your category
- Add your Item
- Review finished article
- Make any needed changes
- Consider backing up the database
- Log out
Writing a Really Long Blog Entry
If you write a long article, a scroll bar will appear on the right side of the “Body” box if you need more space, and when published, the whole article will appear on your blog page. But if you write a really long article, you can split it up — the first part will show up on the front page, and readers can click on a simple link to read the rest. First I'll show you how to create a long article, and then I'll show you how it looks when it's published. Of course, this example will be short.
To start, create an item in the usual way. In the “Body” section, write your first few paragraphs, an introduction, or perhaps an abstract of the entry — whatever makes sense for you.
Next, scroll down the page a bit until you get to the “Extended” box. This is where you'll add the additional text for your very long article:
One you're finished writing the complete article, you'll have to scroll up the page to get back to the “Submit” area. Click the “Add Item” button, and you're published. As you can see, the one short paragraph I entered into the “Body” box shows up on the blog, with the link “[Read More]”.
Here is what you see when you click on that “[Read More]” link:
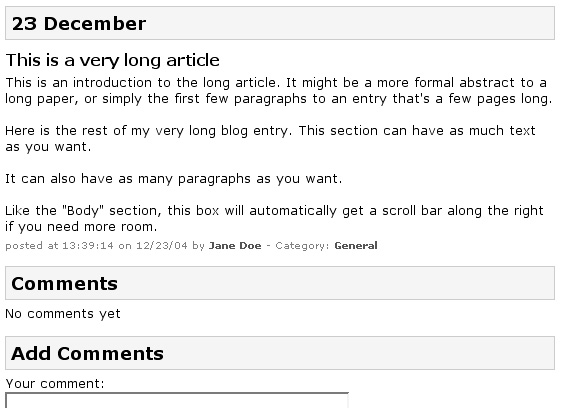
As you can see, clicking on that “[Read More]” link takes you to a page (the “item” page) that shows the entire very long article. The title, the text I entered into the “Body” box, and the text I entered into the “Extended” box appear one after the other. There are no links to “[Read More]” and no separate pages to view. This page is also where readers can add their comments.
Formatting
This section will discuss different ways to format your blog entry. Because you will have to learn just a bit of HTML and CSS code, creating bold or italic text and web links is just a bit more complicated than creating a simple article. Still, it's pretty easy. I'll walk you through a few examples. But first, a few notes about browsers.
A Few Notes About Browsers
Remember this? It's the JavaScript toolbar. You've seen it before, but we've ignored it until now:
The buttons automatically add some HTML code that makes it easier to format your blog entry. They're written in JavaScript, a simple scripting language. Unfortunately, not all browsers interpret it very well. You'll have the most problems using an older version of a browser with a newer version of Nucleus. Here are some known issues:
- There seems to be a bug in the Internet Explorer web browser version 6 (especially when used on Windows XP) that causes the browser to “hang” when you first “Add” your entry into the database. Despite this, the article probably has been published. Go to another browser window with your blog in it, and reload or refresh the page — your article should be there. (This isn't really a “button” issue, but fit into this section about browsers.)
- Your browser's security settings may be interfering. Most people who have problems using these buttons are using the Internet Explorer web browser, version 6. Within the browser, under Tools/Internet Options, click on the Security tab, and then click on the “Custom Level…” button. Change the settings at the bottom of that window to Medium. If that doesn't help, then try changing the settings to Medium-low, or Low. You can change these settings specifically while you are writing a web log article, and then change them back, if you are uncomfortable lowering these settings on a permanent basis. Note that all web browsers have security settings, although in slightly different spots. Try changing them if you're having problems.
- If things are going well, you'll be able to select the text you want to make bold (for example), click on the bold button, and the code will automatically be inserted around your selected text (this will make more sense a littler farther on in this document). If things aren't going well, the code will be added at the end of all the text you've written, or (if things are going worse) the code will be added in random places in the middle of your text. Once you're familiar with the code it'll be easy to cut and paste it into the correct spots, and in some cases you may simply learn to add this code yourself.
- There is a second line of buttons right above the “Extended” box. If things are going well, clicking on this set of buttons will place the code into the “Extended” box. If things are going badly, this set of buttons will place the code above, into the “Body” box. Cut and paste, or learn the code.
- You'll probably run into the most problems if you're still using Mac OS 9. The Mozilla browser works the best, but still not all that well. For example, you will be able to upload images using the Nucleus interface, but you won't be able to easily add the code that displays the image in your blog entry.
Yes, there's hope! Many Nucleus users are now using the Firefox browser, and problems with the buttons have all but disappeared. Except for Mac OS 9 users, since Firefox doesn't have a version for that operating system — but you wanted to upgrade to OS X anyway, right?
Note that there is another toolbar available for people using Internet Explorer. This offers a couple of extra buttons that do a couple of extra useful things. If you'd like to try it, scroll down that left column on all the Admin pages and click on “Global Settings.” Scroll down the next page until you see “Javascript Toolbar Style.” Choose “Full Toolbar,” scroll down the page again to click on the “Update Settings” button, and then go add or edit an item to see what you can do.
Bold, Italics and Alignment
First, we'll focus on these buttons:
If you click on the first B button, for bold text, some code (<b></b>) is automatically entered into your “Body” box. If you're lucky, you'll be able to select the text you want to be bold first, and then click on the B button, and the code will be placed correctly. If not, this is what it should look like.
You must place your cursor in between these to create bold text.
<b>text in between these two bits of code will be bold</b>
The same is true for the second I button, except this will italicize the text: <i></i>
<i>text in between these two bits of code will be italicized</i>
Skip the third button for now. The fourth, fifth and sixth buttons will align your text:
<div style=“text-align: left”>text here will be aligned left</div>
Note that “left” is the default alignment — you usually won't have to add this.
<div style=“text-align: right”>text here will be aligned right</div>
<div style=“text-align: center”>text here will be centered</div>
Below, you'll see that I have continued writing my article. The words “my fabulous blog!” will be bold.
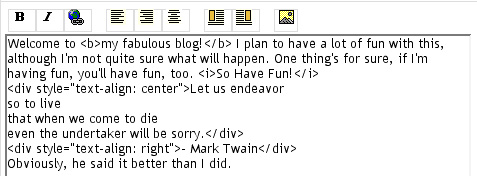
Now I'll add more text and formatting code. Look at this closely:
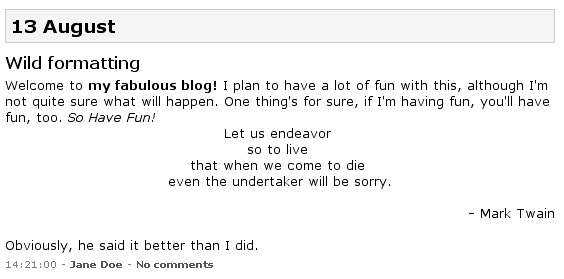
Now take a close look at how the entry looks when it's published:
Finally, take a look at how the entry appears on the Items page. None of the code shows up here, and none of the formatting is displayed. Don't worry, it's there. Also note that not all of the entry shows up:
Adding Hyperlinks
Now I want to link to a web page. To do this, I click on the third button. It's a small blue planet with some chain, depicting a world wide web link:
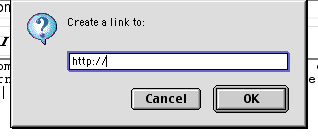
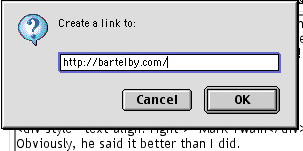
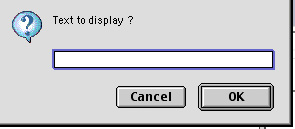
Clicking on this button will bring up a small, new window that looks something like this:
You must enter a complete URL, with the text http:// — but be sure there is only one http:// — the box will then look like this:
Once you've entered the URL, click on the OK button. Code will be automatically entered into your “Body” box, like this:
Like the code for creating bold or italicized text, you must now place your cursor in the correct spot to write the text that will become the link:
<a href=“http://bartelby.com/”>link text goes here</a>
Below is the hyperlink code in the “Body” box:
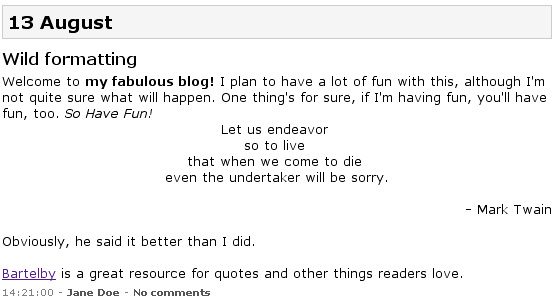
Here's how it looks when published to the blog:
Adding Images
First, the image you want to publish with your article must be on your computer hard drive, so that you can upload it to the web log's server. Also, the web log software is expecting you to upload items that are viewable with a web browser, such as JPEG and GIF (with file extensions .gif, .jpg, or .jpeg). (Note: to see all file types that Nucleus will let you upload, scroll down in the left column on your Admin pages and choose “Global Settings.” Scroll down that page to “Media/Upload Settings” and take a look at the listing for “Allow File Types for Upload.” You can add to this list if you want to.)
To upload an image, click on the image button, which is the button on the far right of the line:
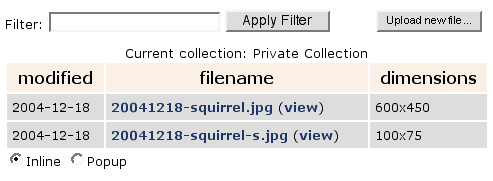
Clicking this will bring up a small browser window. This media window will show the image files that you have most recently uploaded to the web site, newest first. Of course, if you haven't uploaded any images yet, there won't be any in your list:
Note that the date will be automatically added to the beginning of each image file that you upload. For example, I uploaded the file called squirrel.jpg on December 18, 2004, and the name of the file was changed to 20041218-squirrel.jpg. This will make it easier to keep track of all images stored on the server. (Note: you can choose not to have the date added to the file name. To change this, scroll down in the left column on your Admin pages and choose “Global Settings.” Scroll down that page to “Media/Upload Settings” and look for the section “Prefix uploaded files with date.” Choose “No” if you'd like, and click on the “Update Settings” button.)
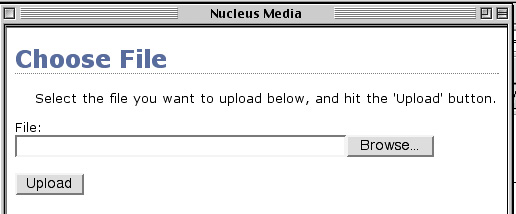
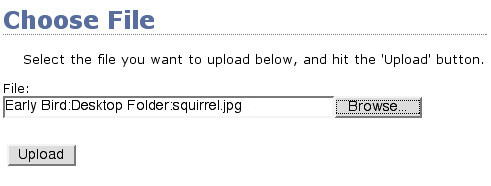
To upload a new image, click on the “Upload new file…” button at the top of this window. Here is what you'll see next:
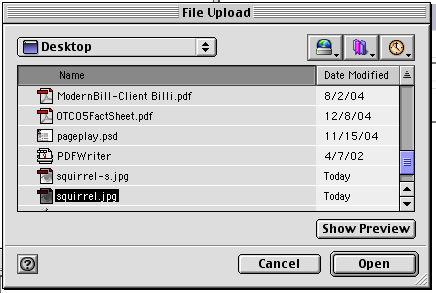
Click on the “Browse…” button to locate the image file on your computer hard drive. What happens next will look different, depending on your computer's operating system and version, and where your file is.
In this case, I am choosing a file called “squirrel.jpg” (yes, I'd already uploaded it in the image above) that is on the desktop of my computer. When I click on the “Open” button in this window, I am taken back to the Choose File window, but now, the file name and its path appear in the “File:” box. In my case, the computer hard drive's name is “Early Bird,” and the desktop is called “Desktop Folder.” The full path to your image will be displayed.
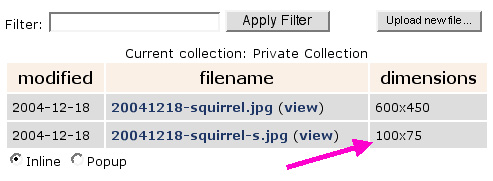
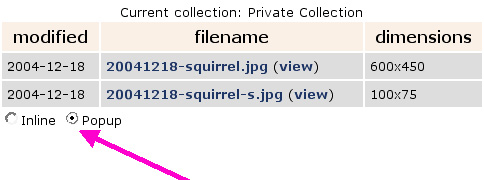
From here, click on the “Upload” button. If the file is large, this may take a few seconds. Now you'll see the Media window again, this time with the photo you just uploaded at the top. Of course, I've already uploaded my images, so I'll point out the “dimensions” column:
The “100×75” on the 20041218-squirrel-s.jpg means that this file is 100 pixels wide, and 75 pixels high (in case you didn't know the dimensions when you first created it). The file 20041218-squirrel.jpg is much bigger: 600 pixels wide and 450 pixels high. The dimensions will become important down the road.
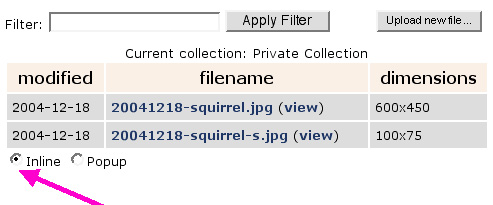
First, I'm going to use the small squirrel image. I'll keep the default “Inline” button chosen.
Then, I'll click on the name of the image I'm using. This will bring up another small window, asking for some text. For “Inline” images, you'll generally want to describe the picture.
When you have typed the appropriate words into the “Text to display” box, click on the “OK” button. Then, you'll be taken back to the “Add Item” page. The code that will display the image will be entered into the “Body” box:
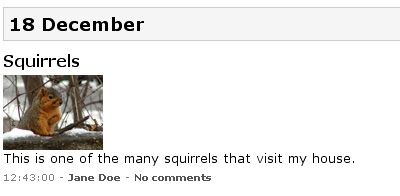
In this case, I entered “this is a squirrel” into the “Text to display” box. The text “This is one of the many squirrels that visit my house.” should appear below my small picture. Let's see what happens when I publish this entry to the blog:
Now I'll add that large picture to the same blog entry, the same way I added the small picture. But this time, since it's so big, I'll display it as a “Popup” image. First choose “Popup,” and then click on the picture's name:
In fact, from this point on the code you create looks almost the same for either “Inline” or “Popup” images. First I'll provide a table that explains some of the differences, and then I'll show you how both images will look when they're published in the web log.
| Inline | Popup |
| picture is generally smaller | picture is generally bigger |
| “Text to display” won't be seen on the web page, but will be “read” by software used by blind people, so should briefly describe the image | “Text to display” will become the link that readers will click to view the large image, so could be something like “Click here to see the picture” |
| Code inserted into “Body” box will look like: <%image(date-filename|width|height|description)%> | Code inserted into “Body” box will look like: <%popup(date-filename|width|height|link text)%> |
| Actual code: <%image(20041218-squirrel-s.jpg|100|75|this is a squirrel)%> | Actual code: <%popup(20041218-squirrel.jpg|600|450|Click here for a close up)%> |
Here is the code as it appears in the “Body” box. First is the small version, which uses the “image” code, then comes my sentence, and next is the large version, which uses the “popup” code.
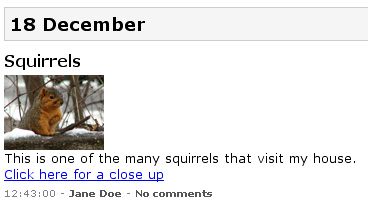
Here is how it looks when it's published in the web log:
When you click on the link for the big image, a separate popup window appears, exactly the size of the image. Once a reader is finished viewing the image, they can simply close that popup window.
Notice below that when this article is listed on the Items page, none of the code that displays the images is shown — not even the text used to link to the bigger image:
There are many ways to use pictures in your blog. And, there are often several ways to do the same kind of thing. For example, you can use Nucleus to create a photoblog by making simple changes to skins and templates. Members of the Japanese Nucleus community wrote several plugins to create a photoblog, read about it in this forum discussion. There are a few other Nucleus plugins that will let you add a photo gallery to your site, so look around on the Nucleus Plugins directory. And, you can change your templates so that all small photos act as a popup link to a bigger picture.
But some very simple tools are the “left” and “right” boxes, see the next section.
"Left" and "Right" Boxes
These two buttons in the JavaScript toolbar will create the “left” and “right” boxes.
The “leftbox” and “rightbox” classes are defined in the CSS file for the default Nucleus skin. Don't know what I'm talking about? Well, I'm not going to explain it to you. Eric Hayot (ciborium on the Nucleus forums) has written a tutorial that explains CSS (and other useful things), where to learn more, and how to change the Nucleus set up. It's called “Nucleus: from beginner to intermediate user.” I highly recommend you read this tutorial before you consider making changes to your style sheet, unless you're already familiar with CSS.
My objective in this section is to show you how to use the boxes, what they'll look like in your published blog, and point out why you might decide to make some changes to the default settings. As with all code inserted by the toolbar buttons, you must place the items to be affected properly:
<div class=“leftbox”>items go in here</div>
or
<div class=“rightbox”>items go in here</div>
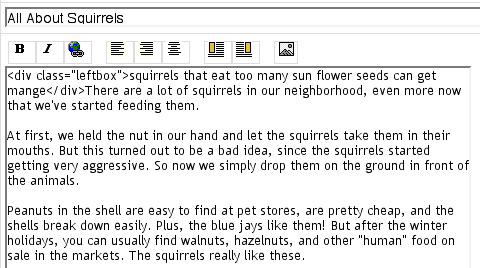
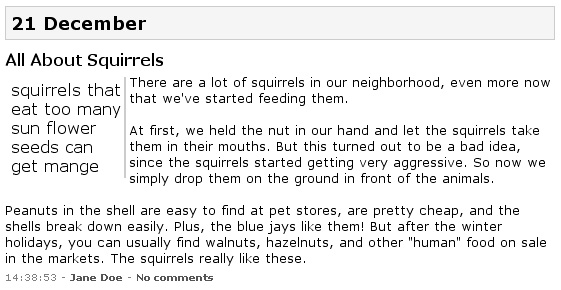
Basically, the item in the box will stay aligned in the top right or left of your blog entry, and additional text will flow around it. A light, grey line is also displayed to the side of the box. First, I'll show what happens when you put text into a box. Here's what the “Add Items” page will look like:
And here's what the blog entry looks like when it's published:
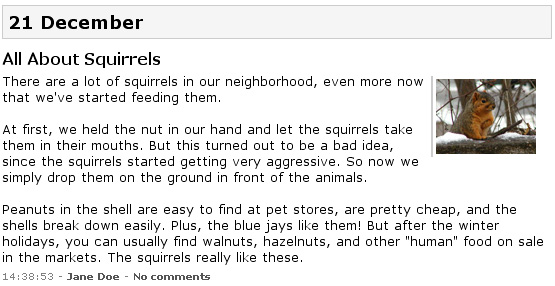
Easy, right? Now, I'll put that small squirrel photo into a “rightbox.” Here's the important part of the code:
And here's what the blog entry looks like when it's published:
Now, I'm going to make a bigger version of the squirrel photo, and place it into a “leftbox.” Here's what happens:
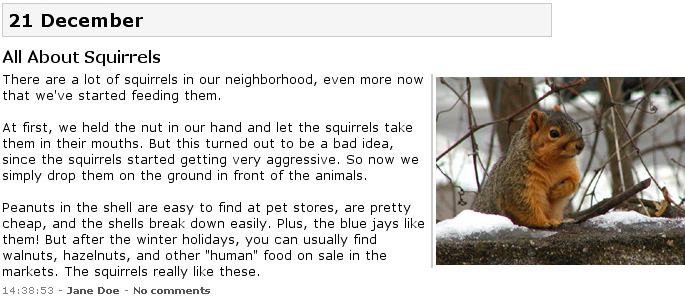
And here's what happens when you put it in the “rightbox:”
Here's why the page layout “breaks.” The CSS file defines the “contents” block — which is where the blog entries are placed — as being 550 pixels wide. The “left” and “right” boxes are defined as having a maximum width of 20% of the width of the contents block — that's 110 pixels. The medium-sized squirrel photo is 250 pixels wide, so it's too big to be published properly in the boxes.
But hey, it's your blog! Now that you know how the boxes are defined, you can use them as is. Or, once you're familiar with CSS, you can change them to suit your needs. Or, you could also create a few new “left” and “right” box definitions in your style sheet. If you keep the names of your new classes similar to the original “leftbox” and “rightbox,” it'll be easy to modify the code that the toolbar buttons insert. Trackwebster explains the idea in the forum.
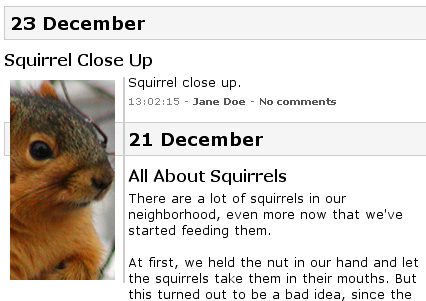
Here's one last tip about using the boxes. Take a look at what happens when you publish a tall photo into a “leftbox.” This photo is narrow enough to fit into the box, but because there isn't much text, the older blog entry is published overlapping the newest one:
If you run into this problem a lot, I suggest you add the following line of code to the definition of the “iteminfo” in your CSS file:
clear: both;
“iteminfo” defines the line that appears below your blog entry: the time published, the author name, and the number of comments. Adding “clear: both;” to the definition will place this line below the “left” or “right” box. And that's all I'll say about CSS!
Time
You might notice that “now” according to the Nucleus software isn't “now” according to your own clock. If this is the case, you'll need to coordinate your time zone with your web server's time zone. Here's how: From the “Admin Home” page, click on “Settings” for your blog. Scroll down that page until you see “Time Offset.” Choose your time difference, click on the “Change Settings” button, and you should be all set.
Nucleus offers a few other time options. See the next sections for more information.
Writing a Draft
If you don't have time to finish an article in one sitting, you can save it as a draft, and work on it later. Scroll down to the Submit area, and select the radio button for “Add to drafts.”
Then, click the “Add Item” button. At this point, you will be taken back to your list of items area, but you probably won't see your draft entry, only your entries that have been published already. In fact, draft entries do show up in this area, but they're at the bottom of the list of published entries. Rather than scroll through pages of old entries, ten at a time, it'll be quicker to go to the “Home” administration page — the page you see when you first log on. To get there from this page, click on the “(Back to Admin Home)” link:
Time goes by.
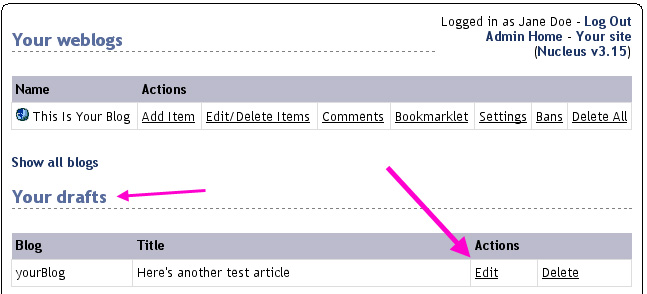
Now you're ready to work on your draft article some more. Now when you log in, scroll down a bit and you'll see that you have a draft entry, in this case entitled “Here's another test article.” You can delete it from here, or click the “Edit” link to continue writing:
When you click on that “Edit” link, you'll be taken to the edit page, where you can work on writing your entry. When you're finished, scroll down to the “Edit Item” area:
NOTE that when you're working on a draft, the “Add back to drafts” radio button will be chosen by default. To publish the article in the web log — and make it “live” on the web site — you must choose the “Add Now” option. Then, click the “Edit Item” button, and you're set. The draft article, now complete, is published to the web site. The software will take you back to your “Items” page, and the new article (entitled “Here's another test article”) shows up at the top of your list:
Publishing an Article at a Specific Time
When you create an article, the publishing software assumes you will want to publish it “now,” and automatically puts the date and time into the Submit section. However, there may be a case where you want to publish the blog entry at a different time than you're actually writing it. For example, you may want to publish an entry to commemorate a specific date; or you may have time one day to write two entries, but only want to publish one of them “now.” NOTE that if you want to be able to publish an entry in the past, you must make the following change: from “Admin Home” choose the “Settings” for your blog. Scroll down that page just a bit and choose “Yes” for the option “Allow posting to the past.”
To publish an article at any time other than “now,” choose the “Add Later” option in the “Submit” section:
Next, modify the date and time boxes as needed. You can specify a date in the past (if you've enabled it for your blog), or a date in the future; in either case, you'll be selecting that same “Add Later” button.
NOTE the order of the date format, which may be different than you're used to:
(dd/mm/yyyy hh:mm)
Also, note that you don't need to specify a zero (zed) if the month or day only has one digit. In the example here, you don't need to add 08 to designate August 21, 2003.
Click on the “Add Item” button to publish the article. Of course, if you have specified a date in the future, it won't show up in your blog until that day.
Finally, when you edit an article, you are given the option of updating the timestamp. To change the date to “now,” choose the “Update timestamp” option in the “Edit Item” section, make any needed changes, and then click the “Edit Item” button.
NOTE that since the web log software orders all articles by date and time, changing the timestamp may change the order that articles are displayed in your blog.

